If you have ever had a super fizzy, fresh, home-brewed kombucha, you already know that few things in this world are quite so refreshing! When you are brewing your own kombucha, the carbonation you end up with is even more satisfying (you made that! With science and stuff!). Kombucha carbonation can be a tricky animal, but it is certainly one worth taking the time to master.
If you are having trouble carbonating your kombucha, don’t panic! This is truly a very common issue for new kombucha brewers. By the time you implement some of the fixes in this article, your only concern will be “burping” your kombucha without creating a fizz volcano! And don’t worry—we can help with that, too 🙂
Kombucha Carbonation: Natural vs. Forced
Kombucha, unlike soda and many other popular carbonated beverages, is carbonated naturally. While this means we cannot simply use a machine to carbonate our kombucha, it also means that we can provide our kombucha with the right conditions to optimize the carbonation. Think of carbonating your kombucha as a science experiment. Lucky for you, we will be identifying all of the variables involved!
Kombucha carbonation is a product of the yeasts present in the kombucha. While our kombucha can become carbonated during primary fermentation, most of the carbonation is released. During second fermentation, we want to trap the kombucha carbonation and provide the yeasts with optimal conditions to produce the carbonation. First and foremost, we need to ensure we have the correct containers for our second fermentation kombucha…
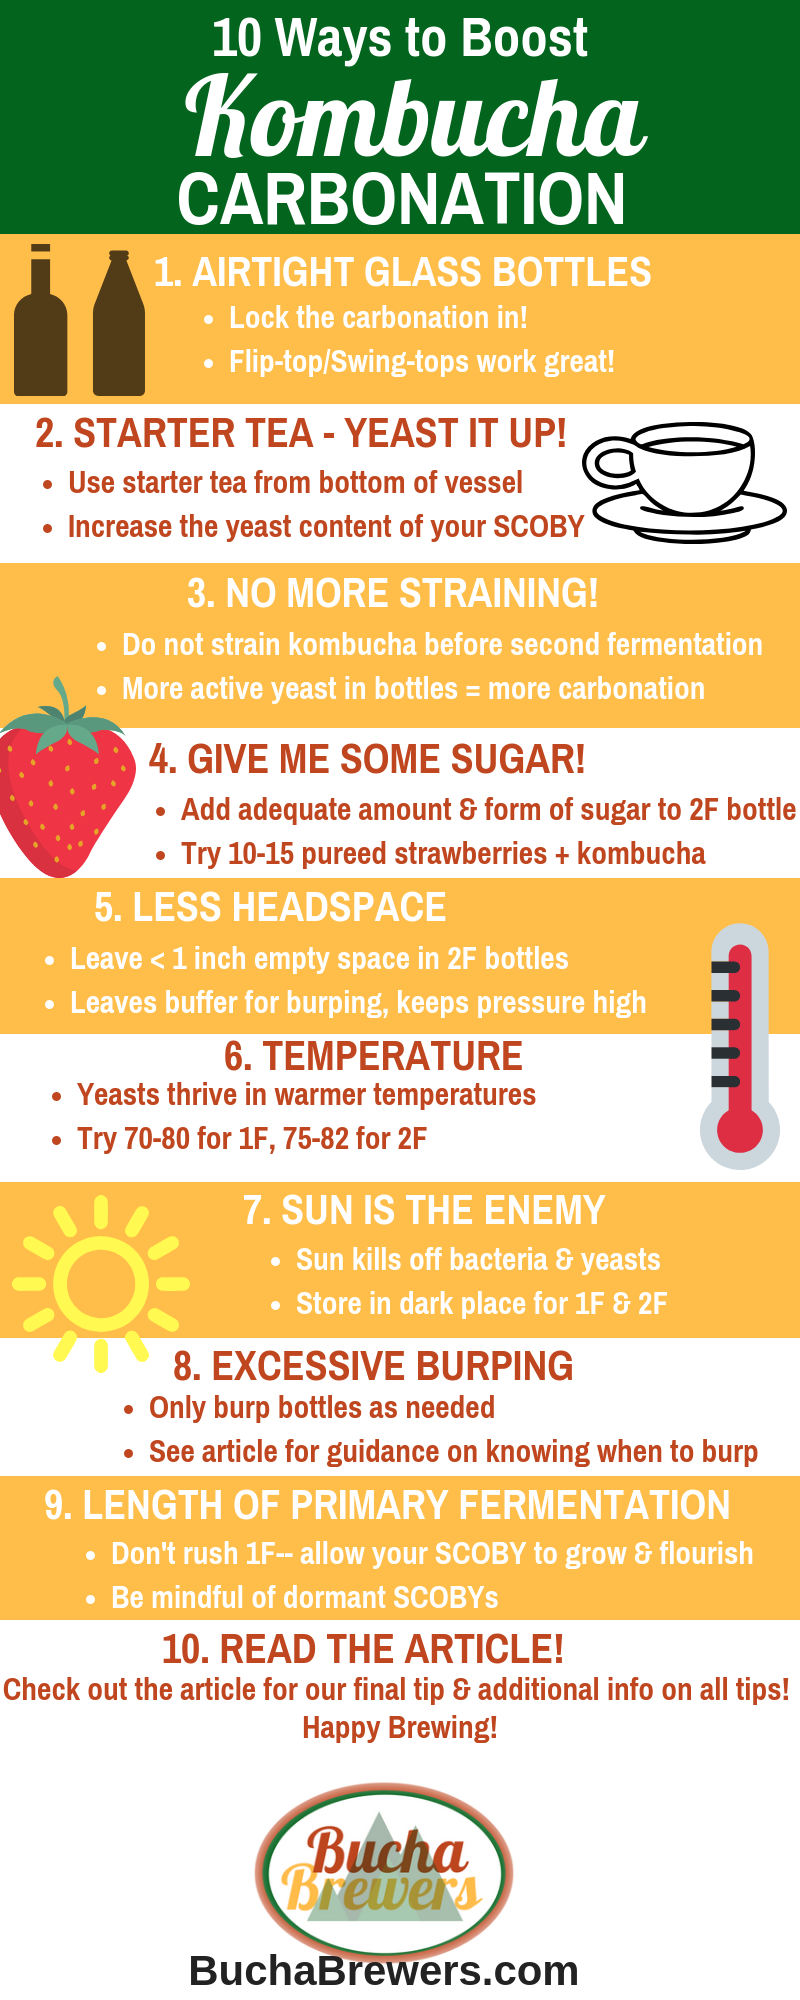
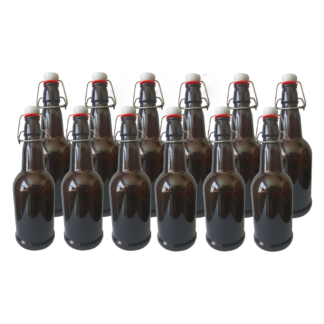
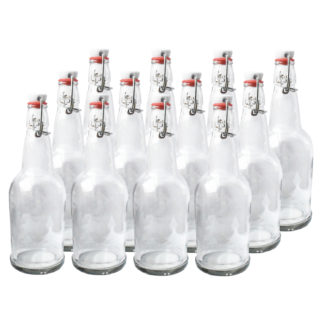
1. Airtight Glass Bottles
As mentioned, we need our second fermentation containers to be airtight in order to trap the kombucha carbonation. Flip-top bottles work best for us. We prefer the 16 oz bottles as they are perfect for drinking afterwards, but any size will work! If you do not have these bottles on hand, no worries! We suggest investing in them for your next brew, but you can look into several airtight alternatives for now.
2. Starter Tea: Yeasty Bottom
As noted above, yeasts are responsible for producing the carbonation in our kombucha. Sometimes, the yeast and bacteria balance in our SCOBYs can be a little off. If our balance is lighter on the yeast side, we may not end up with the carbonation we are looking for.
Fortunately, we can fix this for future brews. Upon setting up your next batch for primary fermentation, try to get your starter tea from the bottom of your last brew. Yeasts tend to sink to the bottom of our brewing vessels. By getting your starter tea from the bottom of your last brew’s jar, you should give the yeast population a head-start for your next batch!
If you have trouble scooping up starter tea from the bottom of the jar, you can simply give you finished kombucha tea a good stir prior to getting your starter tea from it. This way, your yeasts will rise within the jar and the starter tea you remove should be more balanced.
3. Don’t Filter Kombucha Before Second Fermentation (2F)
On a related note, we would also recommend passing on filtering out the floating bits in your finished kombucha prior to bottling for second fermentation. If they freak you out, we promise you will hardly notice them when it’s time to drink your finished kombucha anyways. They are also perfectly healthy!
Those floating bits are usually yeasts strands and pieces that have broken apart from your SCOBY. By keeping them in the brew, you are directly increasing the amount of yeast present in your second fermentation to consume sugars and create carbonation. If you had been filtering out these yeast bits, this is probably one of the most effective changes you can make to increase your carbonation!
4. Sugars During 2F
If you hadn’t picked up on this already, sugars are essentially what fuel the yeasts and enable them to produce carbonation. You want to ensure that you are adding enough sugars during second fermentation, and you also want to be adding the right sugars. We tend to have the best results with fresh, sweet, pureed fruits. If you are not getting the carbonation you want, try pureeing 10-15 strawberries per 16oz bottle and filling the rest with kombucha.
If you are not a fan of strawberries, try blueberries, peaches, or pineapples. You can eventually use any type of fruit—these are just some high-sugar fruits that tend to produce a lot of carbonation. If you are really not feeling the extra work, go with slightly less than ¼ cup of fruit juice OR ½ tsp of cane sugar or plain white sugar per 16oz bottle.
5. Headspace in the Bottle

Another important change you can make to increase carbonation in your kombucha is leaving less headspace, or extra room, in your bottles. We recommend filling the bottles to a point that leaves slightly less than an inch of headspace at the top of your bottle. This will give you a slight buffer for releasing excess kombucha carbonation, but will also limit the amount of oxygen present in the bottle and keep pressure higher.
6. Temperature
Yeasts in your kombucha thrive in warmer temperatures. While they will be fine in temperatures as low as 68 degrees, they can be less active and take longer to produce lesser results. If possible, try storing your kombucha in a warmer location during 1F and 2F. During 1F, 70-80 degrees is best. During 2F, try 75-82 degrees if possible. The closer you can get to the upper temperature range, the faster your kombucha carbonation builds up. It’s okay to place your kombucha bottles in a stuffy closet during 2F—we are no longer worried about airflow at this point.
7. Avoid Sunlight
This is crucial during primary fermentation, and it is also important for second fermentation. Sunlight can kill bacteria and yeasts present in your kombucha and SCOBY. Without the bacteria and yeast, we have neither fermentation nor carbonation. We recommend place your 1F kombucha in a closet with the door cracked open (to maintain adequate airflow) or a small room without windows. During 2F, you can placed the bottles in a closed pantry or closet as the process is anaerobic (oxygen is not needed).
8. Burping—Don’t Overdo It
While it is important to burp your kombucha if you ARE producing lots of kombucha carbonation, you are only giving yourself backwards progress if you do not have carbonation. We recommend carefully cracking the lid on your second fermentation kombucha bottles after 24 hours. If your kombucha rises and you have a lot of carbonation, continue burping it at least daily. If your kombucha level stays the same and you do not hear significant pressure being released, do not burp it again until 48 hours later. Worried about an explosion? Store the bottles in a sealed cooler during 2F for peace of mind!
9. Time Spent in Primary Fermentation (1F)

Another potential cause of low carbonation in your kombucha could be rushing it out of primary fermentation. You will want to make sure you give your baby SCOBY plenty of time to grow and flourish! This can particularly be an issue if it is the first batch you are making with a SCOBY you received or purchased.
SCOBYs can become dormant when packaged, and they need a little more time to get up to speed if they are dormant. Don’t be too eager to drink your kombucha, and don’t be afraid to let it ferment for too long! Kombucha can ferment for up to a month. While this might be too much for you, we would suggest giving 1F for 2 weeks a try if you usually begin second fermentation closer to a week.
10. Time Spent in 2F
Make sure you are giving your kombucha an adequate amount of time to ferment during second fermentation! While juices, pureed fruits, and sugar tend to ferment quicker (generally 1-4 days), whole fruits, vegetables, and herbs can take up to 7 days. Be patient with your kombucha, and it should treat you well in return!
Kombucha Carbonation Galore!
Give these fixes a try! Don’t be upset with us if you end up with a kombucha bottle that wants to open like a bottle of champagne! 🙂 We recommend burping your bottles with a towel over the cap just in case! We also recommend opening the lid very gradually—keep some pressure on it and lift one side just a bit to gauge whether you will have fizz trying to fly out.
If these fixes don’t give you ample carbonation right away, don’t be discouraged! You are building up your yeast population, and it can take a couple of brew cycles to pay off sometimes. Be patient, and feel free to comment below for additional troubleshooting if you don’t have insanely fizzy kombucha by your third brew! Best of luck!

[…] to burp them—with extreme caution—multiple times a day during second fermentation! If you are having issues carbonating your kombucha, fresh strawberries are a great place to start […]
[…] in mind, additional sugar also means additional carbonation. You will want to monitor your bottles closely and burp them as needed to prevent an […]
[…] in mind, additional sugar also means additional carbonation. You will want to monitor your bottles closely and burp them as needed to prevent an […]